Thursday, December 24, 2020

Using Volume in Docker to Store Persistent Data

Docker container is not persistent, that means, the data stored in a docker container will be gone if the container is destroyed. One of the way to store persistent data while using docker container, is to use the docker volume feature to store your data. 


To use the volume, we need to create the volume first. 

$ docker volume create myvolume


We can inspect the volume's detailed information using inspect command. This is how we get to know where exactly in filesystem, that the volume resides. and all other information about the volume.

$ docker volume inspect myvolume

[

    {

        "CreatedAt": "2020-12-24T09:18:03+08:00",

        "Driver": "local",

        "Labels": {},

        "Mountpoint": "/var/lib/docker/volumes/myvolume/_data",

        "Name": "myvolume",

        "Options": {},

        "Scope": "local"

    }

]


To make use of the volume, we will use the --volume flag of the docker run command. For example, we want to create a container from an alpine linux image, run a command in it (in this example, a date command), store the output of the command in a volume, exit, and delete the container after that.

$ docker run --rm --volume=myvolume:/tmp alpine sh -c "date > /tmp/currenttime"


Once the container finished running, we can go to the location of the volume in the filesystem, and we can retrieve the file that is created by the container, even though that container no longer exist.

$ sudo ls /var/lib/docker/volumes/myvolume/_data

currenttime

$ sudo cat  /var/lib/docker/volumes/myvolume/_data/currenttime

Thu Dec 24 01:25:34 UTC 2020


So this is how my friend, one of the way to store persistent data generated using docker container.

Wednesday, December 23, 2020

Installing Wordpress using Podman

Podman is a daemonless container engine to manage OCI containers. To run a set of containers for wordpress installation, below are the steps. To install podman in centos 8, you can refer here.

First you need to create a pod, so that the containers can talk to each other easily within the pod. Expose port 8080 for the pod to reach port 80 in the pod

# podman pod create --name mywordpress --publish 8080:80


Wordpress consists of 2 components, a wordpress front end and a database backend. We will create the backend first, using mysql image from dockerhub. Make sure to include the newly created container into our pod.

# podman run --detach --pod mywordpress \

-e MYSQL_ROOT_PASSWORD=1234 \

-e MYSQL_DATABASE=mywpdb \

-e MYSQL_USER=mywpuser \

-e MYSQL_PASSWORD=1234 \

--name mywpdb docker.io/mysql


We will then proceed to create a wordpress container. We will use 127.0.0.1 (localhost) as reference to our mysql container, because both containers are in the same pod.

# podman -run --detach --pod mywordpress \

-e WORDPRESS_DB_HOST=127.0.0.1 \

-e WORDPRESS_DB_NAME=mywpdb

-e WORDPRESS_DB_USER=mywpuser \

-e WORDPRESS_DB_PASWORD=1234 \

--name mywp docker.io/wordpress


Open a web browser, and browse to localhost:8080 (or <ip address>:8080), to get the wordpress installer wizard. Follow through the wizard to continue the wordpress installation.

Tuesday, December 22, 2020

Set Bitnami Wordpress Application to Start on Boot on Ubuntu 20.04

To set a bitnami wordpress application to start on boot, you just need to make sure that systemctl can use the ctlscript. To do that:


1. Locate the installation directory of your bitnami wordpress. If you are following the default setting, the location should be in /opt


2. Locate the ctlscript.sh file, which is the script to start, stop and restart bitnami-application.

$ sudo find / -iname "ctlscript.sh" -type f

/opt/bitnami-wordpress-5.6-0/ctlscript.sh


3. Copy the script to /etc/init.d, and rename it to bitnami-wordpress

$ sudo cp /opt/bitnami-wordpress-5.6-0/ctlscript.sh /etc/init.t/bitnami-wordpress


4. Edit the script, and add "INIT INFO" settings below #!/bin/sh to ensure systemd can understand the script

#!/bin/sh

### BEGIN INIT INFO

# Provides:          bitnami-wordpress

# Required-Start:    $remote_fs $syslog

# Required-Stop:     $remote_fs $syslog

# Default-Start:     2 3 4 5

# Default-Stop:      0 1 6

# Short-Description: Start daemon at boot time

# Description:       Enable services provided by daemon.

### END INIT INFO

...


5. Save the file, and make systemd aware of the new startup script
$ sudo systemctl daemon-reload

6. Test the new bitnami-wordpress script
$ sudo systemctl status bitnami-wordpress

7. Enable bitnami-wordpress on boot
$ sudo systemctl enable bitnami-wordpress

8. Test it out by rebooting your machine...
$ sudo reboot

9. ...and check the status of the bitnami-wordpress service after reboot
$ sudo systemctl status bitnami-wordpress

Installing a Bitnami Wordpress Stack on Ubuntu 20.04

Bitnami team have done a great job in making the adoption of a lot of open source software easier. Today I want to show how you can install a bitnami wordpress stack on ubuntu 20.04.

First, we need to visit https://bitnami.com/stack/wordpress/installer, and download the installer for linux. As of today, the version available is 5.6.0.

$ wget -c https://bitnami.com/redirect/to/1252289/bitnami-wordpress-5.6-0-linux-x64-installer.run 

Once downloaded, give the file permission to be executed

$ chmod +x bitnami-wordpress-5.6-0-linux-x64-installer.run

Run the installer

$ sudo sh bitnami-wordpress-5.6-0-linux-x64-installer.run

Run through the wizard. In this example, we will install just wordpress and mysql, with default option for most of the questions asked in the wizard.

Once the installation is complete, you will see below confirmation:

Bitnami confirmation

Choose Y to start bitnami wordpress.

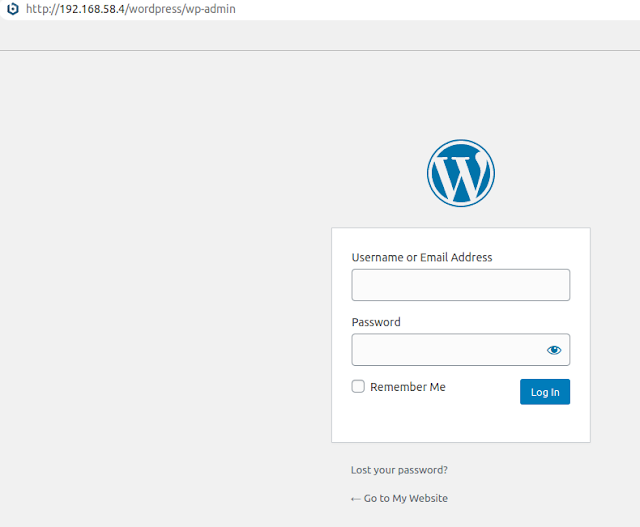
Your wordpress site can now be accessed at http://<ip address>/wordpress, and the admin page can be accessed at http://<ip address>/wordpress/wp-admin, my ip address in this example is 192.168.58.4.
Wordpress main page

Wordpress admin page

In order to control the service, you can do so by using the script in bitnami installation directory called ctlscript.sh. In this example, I used the default settings for the installation directory, which is /opt/wordpress-5.6-0.

To show status of bitnami wordpress
$ sudo /opt/wordpress-5.6-0/ctlscript.sh status

To stop wordpress services
$ sudo /opt/wordpress-5.6-0/ctlscript.sh stop

And to start wordpress services 
$ sudo /opt/wordpress-5.6-0/ctlscript.sh start


Monday, December 21, 2020

Restarting Cinnamon Desktop Environment

There are 3 ways to restart cinnamon desktop environment:

1. Use ctrl + alt + esc shortcut

2. Press alt + f2, and type r into the dialog box

3. Open a terminal (or virtual terminal pressing ctrl + alt + f1), and run this command:

$ pkill -HUP -f "cinnamon --replace"

Sleep / suspend linux from command line

To suspend a linux machine using command (useful if you want to suspend a machine that is connected via ssh), the command is pretty simple

$ sudo systemctl suspend

That's all. 

Friday, December 4, 2020

Installing Broadcom BCM4322 Driver for Linux Mint 20 (Ulyana) in Macbook Pro 2009

I got an old MacBook Pro 2009 from a friend, and the hardisk is busted. After getting a brand new Apacer Panther SSD, I managed to replace the disk, and I tried to revive the old machine using MacOS internet recovery process.

Unfortunately, this model does not have the internet recovery feature. To make a usb recovery for macos, it is highly advisable to do it from a mac, and I do not have any spare mac.

So I decided to boot a linux mint 20 live usb, and it is surprisingly working well, except the wireless driver is not installed by default.

In order to install the driver, I need to know the model first. This can simply be achieved using "lspci" command

$ lspci | grep i wireless

03:00.0 Network controller: Broadcom Inc. and subsidiaries BCM4322 802.11a/b/g/n Wireless LAN Controller (rev 01)
 

Now that we know the wireless card model and maker, I connect a network cable to the machine, and start researching for the solution. I found the solution here.

And below is how to do it.

You need to install a package called bcmwl-kernel-source from the repository.

$ sudo apt update

$ sudo apt install bcmwl-kernel-source -y


Once installed, you can now connect to your wireless, and that is all, folks.

Tuesday, December 1, 2020

Extending / in Default CentOS Partitioning Scheme

The default partitioning scheme for CentOS is not ideal, because the installer only give 50Gb to /. and the rest to /home. Luckily, the partitions are being setup in LVM, thus enable us to change it without reinstalling the operating system. 

In this example, I will show how to remove logical volume used by /home, and assign it to / instead.

First of all, you need to be root in order to do this.


This is the original partition layout:

# df -Th

Filesystem          Type      Size  Used Avail Use% Mounted on

...

/dev/mapper/cl-root xfs        50G  4.1G   46G   9% /

/dev/mapper/cl-home xfs       1.9T   14G  1.9T   1% /home

/dev/vda1           ext4      976M  194M  716M  22% /boot

...


As you can see, we are not going to use 1.9T in /home, so we are going to assign that to / instead.

Second step, make a backup of /home
# cp -apv /home /home2

Next, unmount /home
# umount -fl /home

Remove the logical volume
# lvremove /dev/cl/home

If you get an error saying that the logical volume is in used, you need to kill off the process first.

Get the major, minor number of the logical volume.
# dmsetup -c info cl-home
Name             Maj Min Stat Open Targ Event  UUID                                                                
cl-home          253   2 L--w    1    1      0 LVM-urbQSwHWhdpFDeVDQA3yFkOjVMkWFGloYGbgzAGW8YOuwacqVZLvVx23qNVJTFHc

Search for the process and process id using the major,minor number
# lsof | grep "253,2"
java       179094                           user  cwd       DIR              253,2        95 1073741952 /home
...

kill off the process
# kill 179094

Try to remove the logical volume again
# lvremove /dev/cl/home

Once deleted, extend the logical volume of /dev/cl/root, to use 100% of free space available in the volume group
# lvextend -l +100%FREE cl-root

Check the filesystem type
# df -Th /
Filesystem          Type      Size  Used Avail Use% Mounted on
/dev/mapper/cl-root xfs        50G  4.6G   46G  10% /

Extend the filesystem, xfs_growfs is xfs filesystem grow tool. For ext4, you need to use resize2fs command
# xfs_growfs /

Check that your / partition is showing the new size
# df -Th /
Filesystem          Type  Size  Used Avail Use% Mounted on
/dev/mapper/cl-root xfs   2.0T   19G  2.0T   1% /

Copy back the content of /home2 to /home
# mv /home2/* /home

IMPORTANT: Remove the old /home mount entry in /etc/fstab
# sed -i.ori '/home/d' /etc/fstab

The last step is very important, it can cause your operating system to fail to boot if /etc/fstab is not configured properly.

Enjoy your newly gained disk space in / partition.

Tuesday, November 17, 2020

Check laptop battery percentage using terminal

There are 2 methods to do this.

First method

The first method is to use cat to display the content of /sys/class/power_supply/BAT*/capacity 
$ cat /sys/class/power_supply/BAT*/capacity

To see the updated value, refreshed every second. -n1 is for refresh every second, and -d is to highlight any changes.
$ watch -n1 -d 'cat /sys/class/power_supply/BAT*/capacity'


Second method

The second method, is to use upower command. To use this command, you need to know the object paths available for your device
$ upower -e
/org/freedesktop/UPower/devices/line_power_AC
/org/freedesktop/UPower/devices/battery_BAT0
/org/freedesktop/UPower/devices/battery_BAT1
/org/freedesktop/UPower/devices/DisplayDevice

So, to check the my first battery information, use below command
$ upower -i /org/freedesktop/UPower/devices/battery_BAT0 | grep percentage

Same goes with the second battery
$ upower -i /org/freedesktop/UPower/devices/battery_BAT0 | grep percentage

Tuesday, November 10, 2020

Using putty via cmd

Putty is an ssh client that many windows users used to connect to ssh server. Due to the complexity of ssh protocol, the settings in putty is also quite complex. 

Here I want to show some examples where you can use putty via the cmd. You can simply copy below commands and paste it inside your cmd, do some changes like IP, username and port, and you are good to go without having to go through many steps to complete some simple task such as setting up a dynamic tunnel.

The first thing that you have to do before using putty via cmd is, to install putty. Just download the installer from here, and install it using the usual double click on installer method.

Once installed, fire up your cmd. 

Below are some basic scenario to use putty (if you are familiar with the linux openssh client, the options are almost identical)


Scenario 1: Connecting to a remote server (with ip 10.10.10.10):

cmd> putty user@10.10.10.10


Scenario 2: Forward a remote port to you local machine, in this case, forwarding port 22 on 10.10.10.10 to port 9999 on your local machine

cmd> putty user@10.10.10.10 -L 9999:localhost:22


Scenario 3: Forward a local port to a remote machine, in this case, forwarding port 22 in localhost to 9999 in remote machine

cmd > putty -R 9999:localhost:22 root@10.0.0.16


Scenario 4: Create a socks5 proxy (dynamic tunnel) on port 8888 in localhost via the remote machine. This is useful if we want to browse addresses that only can be accessed by the remote machine, but the remote machine does not have an internet browser.

cmd> putty user@10.10.10.10 -D 8888


Scenario 5: Connect to a remote machine, via port other than 22. In this case, sshd is running on port 9999

cmd> putty -P 9999 user@10.10.10.10


There you go, 5 scenarios where you can use putty via command line. Hope this will make your life easier when using putty. Ciao!

Sunday, November 8, 2020

Checking your public IP from terminal

Sometimes, when you are setting up a linux machine, there is a need to know what IP our machine is being connected to the public internet. There are many websites that provide this kind of service, but below are some of my favorites that work well with commands. 


To be able to use this, we need a text based web browser. We will use curl in this case. Install curl if your machine does not have one.

# yum install curl -y


To get our ip address, run curl like below. Choose whichever you like :).

$ curl ipecho.net/plain

210.210.210.210

$ curl icanhazip.com

210.210.210.210


The best, in my opinion is ipinfo.io, because it will give you a nicely formatted information regarding your public IP address, and if you want a specific info, just put it as a slash being ipinfo.io. For example, if you want to know what is your city, just curl ipinfo.io/city

$ curl ipinfo.io

{

  "ip": "210.210.210.210",

  "city": "Kuala Lumpur",

  "region": "Kuala Lumpur",

  "country": "MY",

  "loc": "3.1390,101.6869",

  "org": "AS4818 Digi Telecommunications Sdn. Bhd.",

  "postal": "50505",

  "timezone": "Asia/Kuala_Lumpur",

  "readme": "https://ipinfo.io/missingauth"

}

$ curl ipinfo.io/ip

210.210.210.210

$ curl ipinfo.io/city

Kuala_Lumpur

Simple http/https proxy using squid

This is a basic proxy setup, whereby you practically does not have to do any settings.

First, install squid in our machine with address 10.0.0.10

# yum install squid -y


Then, start squid service

# systemctl start squid


By default squid runs on port, 3128, so we will allow 3128/tcp on our firewall

# firewall-cmd --add-port 3128/tcp

# firewall-cmd --add-port 3128/tcp --permanent


Now the time to test out our proxy, in a different machine. This test machine does not have any internet connection to the outside world, except network connection to our proxy server.


First we use curl to try to reach ipecho.net/plain without proxy

$ curl ipecho.net/plain

curl: (6) Could not resolve host: ipecho.net


Next we will use curl with our brand new proxy. We can see that our machine is able to reach ipecho.net/plain, with the help of the proxy.

$ curl --proxy http://10.0.0.10:3128 ipecho.net/plain

210.210.210.210


Nice, happy proxying.

Saturday, November 7, 2020

Set static IP address in ubuntu 18.04

Starting from ubuntu 18.04, network configuration is now handled by netplan, which is based on YAML.


To set a static ip in netplan, you need to know what is the interface name that you want to configure. To do that, just run "ip address" command
$ ip address
1: lo: <LOOPBACK,UP,LOWER_UP> mtu 65536 qdisc noqueue state UNKNOWN group default qlen 1000
    link/loopback 00:00:00:00:00:00 brd 00:00:00:00:00:00
    inet 127.0.0.1/8 scope host lo
       valid_lft forever preferred_lft forever
    inet6 ::1/128 scope host 
       valid_lft forever preferred_lft forever
2: enp0s3: <BROADCAST,MULTICAST,UP,LOWER_UP> mtu 1500 qdisc fq_codel state UP group default qlen 1000
    link/ether 08:00:27:18:46:ea brd ff:ff:ff:ff:ff:ff
    inet 192.168.0.154/24 brd 192.168.0.255 scope global dynamic enp0s3
       valid_lft 604595sec preferred_lft 604595sec
    inet6 2001:e68:542c:e410:a00:27ff:fe18:46ea/64 scope global dynamic mngtmpaddr noprefixroute 
       valid_lft 259188sec preferred_lft 172788sec
    inet6 fe80::a00:27ff:fe18:46ea/64 scope link 
       valid_lft forever preferred_lft forever
3: enp0s8: <BROADCAST,MULTICAST> mtu 1500 qdisc noop state DOWN group default qlen 1000
    link/ether 08:00:27:7d:fa:68 brd ff:ff:ff:ff:ff:ff

You can see that we have 2 interfaces, enp0s3 and enp0s8. Now we have to locate which file need to be edited to give enp0s8 a static IP address. We can do that by:
$ ls /etc/netplan/
01-netcfg.yaml

To add an ip address  of 10.10.10.10/24 to enp0s8, with gateway 10.10.10.1 and nameserver 8.8.8.8 and 8.8.4.4, simply edit /etc/netplan/01-netcfg.yaml as per below
$ sudo vi /etc/netplan/01-netcfg.yaml
network:
  version: 2
  renderer: networkd
  ethernets:
    enp0s3:
      dhcp4: yes
    enp0s8
      dhcp4: no
      addresses: [10.10.10.10/24]
      gateway4: 10.10.10.1
      nameservers:
        addresses: [8.8.8.8,8.8.4.4]

Save the file. Since this is a yaml based configuration, make sure that the indentation is uniform across the file. To test your configuration for any syntax error, and press ENTER if you agree to use the configuration:
$ sudo netplan try
Do you want to keep these settings?


Press ENTER before the timeout to accept the new configuration


Changes will revert in 119 seconds
Configuration accepted.  

Once accepted, verify the ip has been set using "ip address" and "ip route"
$ ip address show dev enp0s8
3: enp0s8: <BROADCAST,MULTICAST,UP,LOWER_UP> mtu 1500 qdisc fq_codel state UP group default qlen 1000
    link/ether 08:00:27:7d:fa:68 brd ff:ff:ff:ff:ff:ff
    inet 10.10.10.10/24 brd 10.10.10.255 scope global enp0s8
       valid_lft forever preferred_lft forever
    inet6 fe80::a00:27ff:fe7d:fa68/64 scope link 
       valid_lft forever preferred_lft forever

$ ip route show dev enp0s8
default via 10.10.10.1 proto static 
10.10.10.0/24 proto kernel scope link src 10.10.10.10 

Thursday, November 5, 2020

Using rsync without ssh

Recently I have encountered a situation whereby I need to transfer a file to a server, and ssh client and server are not installed in that server. And to make matters worst, that server does not have internet connection for me to install openssh-clients on it. Luckily, that server has rsync installed, which kind of save my day. 


What I will show here, is how to transfer file using rsync protocol without ssh. We will call the server without ssh, and without internet connectivity with serverA, and the other server that has internet connectivity as serverB.

serverA: server without ssh and internet connectivity

serverB: server with internet connectivity


After I have acquired all the files needed by serverA by downloading in serverB, I need to start rsync in daemon mode. Before that, I need to tell rsync which folder that I wish to share via the rsync protocol, by editing /etc/rsyncd.conf. Let's say I want to share my /tmp directory, which contain a file called myfile.txt.

serverB # cat >> /etc/rsyncd.conf <<EOF

[tmp]

    path = /tmp

EOF


Next, start rsync in daemon mode. Rsync will make use of the /etc/rsyncd.conf for the daemon configuration.

serverB # rsync --daemon


We can see that rsync by default will listen on port 873

serverB # ss -tulpn | grep rsync

tcp     LISTEN   0        128              0.0.0.0:873             0.0.0.0:* 


In serverA, we need to use the rsync command to connect to rsync daemon in serverB. To check which directory is available for download:

serverA # rsync serverB::

tmp


Download the file

serverA # rsync serverB::tmp/myfile.txt

serverA # ls 

myfile.txt


You have now downloaded the myfile.txt file, from serverB just by using rsync. A note to remember, rsync protocol does not have any encryption, but it is good enough for a LAN environment.

Download rpm installer file for already installed packages

If you have not install the packages, you can always use --downloadonly flag to just download the packages without installing. For example, I want to download rpm file for curl

# yum install --downloadonly curl


The file and its dependencies will be saved into /var/cache/yum.


But if you have installed the package, the above command will only return a message saying that "Packages is already installed, and nothing to do."


In order to download rpm file of an installed package with dependencies, another command is needed, which is repotrack, that is a command in yum-utils package.


First, install yum-utils

# yum install -y yum-utils


Then, run repotrack on the package that you need the rpm installer

# repotrack curl


All the packages will be downloaded to the current directory. Nice!

Wednesday, November 4, 2020

Minio on podman failed to run due to wrong selinux tag

 I tried to install minio on podman, following this guide.


I created a directory for data

# mkdir /data


I then start minio container

# podman run -dit -p 9000:9000 -e "MINIO_ACCESS_KEY=minioadmin" -e "MINIO_SECRET_KEY=myminioadmin" -v /data:/data  minio/minio server /data


The container was started, but exited as soon as it finished starting up

# podman ps

CONTAINER ID  IMAGE                         COMMAND       CREATED        STATUS            PORTS                   NAMES

# podman ps -a
CONTAINER ID  IMAGE                         COMMAND       CREATED        STATUS            PORTS                   NAMES
fb7073bc3baf  docker.io/minio/minio:latest  server /data  6 minutes ago  Exited (1) 6 minutes ago   0.0.0.0:9000->9000/tcp  wonderful_galois


Checking the log, I found out that the container failed to start due to permission error on the /data
# podman logs fb 

The error is as in below image
selinux error while starting minio container

I checked the directory, but the permission is correct
# ls -ld /data
drwxr-xr-x. 3 root root 24 Nov  4 03:55 /data


This must be selinux. So I searched around for a proper tag for minio related files and directories. Referring to this article, I decided to use the tag for content as per that article.
# chcon -R system_u:object_r:container_file_t:s0 /data


Now, time to test. I rerun the container.
# podman start fb
# podman ps
CONTAINER ID  IMAGE                         COMMAND       CREATED         STATUS            PORTS                   NAMES
fb7073bc3baf  docker.io/minio/minio:latest  server /data  14 minutes ago  Up 2 seconds ago  0.0.0.0:9000->9000/tcp  wonderful_galois


Yes, it worked. If you guys ever encounter the permission issue, make sure to check the selinux tag, besides checking the standard unix permission on the directory.

Friday, October 30, 2020

Installing rancheros on virtualbox

Rancheros is a simple linux operating system, equipped with docker for easy deployment of docker in a virtual machine.

In this example, we will use virtualbox as our hypervisor.


First, download the rancheros iso from here

$ wget https://releases.rancher.com/os/v1.5.6/rancheros.iso


Then, fire up virtualbox and create a linux 64-bit virtual machine with 1GB memory, 8GB hard disk, and a bridged network.


Next mount the rancheros.iso file to the cdrom of the virtual machine we just created above, and boot the virtual machine.


Once booted, open the virtual machine console, change the password, and get the ip address of the virtual machine.

$ sudo passwd rancher

$ ip address


In this example, I will use 10.0.0.10 as the ip address of the virtual machine. Now, fire up your terminal, and ssh into the virtual machine.

$ ssh rancher@10.0.0.10


Once logged in, we will create a pair of ssh key for the user

$ ssh-keygen


We need to keep the private key in our host machine, so that we can use it to login to the virtual machine once we have installed rancheros to disk. So open another terminal, and download the private key we just generated above.

$ scp rancher@10.0.0.10:~/.ssh/id_rsa ~/rancher_id_rsa


Now we have to create a cloud-config.yml file, that is needed for rancheros installation to disk. We will have to include the ssh public key generated above, into the cloud-config.yml

$ echo -e "ssh_authorized_keys:\n  - $(cat ~/.ssh/id_rsa.pub)" > cloud-config.yml


Install rancheros to disk using ros command.

$ sudo ros install -c cloud-config.yml -d /dev/sda


Once finished, you can ssh into the rancheros on virtual machine's disk, by including the rancher_id_rsa file into your ssh command

$ ssh -i ~/rancher_id_rsa rancher@10.0.0.10


Once logged in, you can now start using docker.

$ docker version


Monday, October 26, 2020

Modifying termux keyboard to get extra keys

I use termux quite a lot when working with shell using my android phone. The older version of tmux has a good vertical keyboard, with essential keys like tab and arrow keys are all accessible in the main keyboard interface. The newer version of tmux, however, does not provide the full arrow keys in the main interface, like below. You can see that only up and down arrow keys are provided.

One good thing about termux is, it is customizable. And you can put whatever key you want on the keyboard interface, like below, just by following simple steps.

1. Open your termux

2. You need to edit a file called "~/.termux/termux.properties". Create the directory if it does not exist.
$ mkdir ~/.termux

3. Start editing the file. You can use any editor like nano or vim (needs to be installed). For the sake of simplicity, I just use cat. Run below command and press enter to edit.
$ cat > ~/.termux/termux.properties

4. Paste the line below to add 2 rows of extra keys. The first row will be populated with ESC, |, HOME, up arrow, END, PGUP and DEL keys, and the second row will be populated with TAB, CTRL, ALT,  left arrow, down arrow, right arrow, page down and backspace keys. Please customize this setting to your liking. You can find the supported keys here
extra-keys = [ \
 ['ESC','|','/','HOME','UP','END','PGUP','DEL'], \
 ['TAB','CTRL','ALT','LEFT','DOWN','RIGHT','PGDN','BKSP'] \
]

5. Press ctrl-d to save the file.

6. Reload termux settings, by running "termux-reload-settings" command.
$ termux-reload-settings

Your vertical keyboard is now added with more keys as per the configuration you have just put in.

Happy typing.


Monday, October 12, 2020

Transferring a proxmox VM to a different proxmox installation (backup and restore)

 To backup a vm, you can use vzdump command. The command just need a vm ID to start the backup process.


Get the VMID

# qm list


Start the backup process. You can choose a compression option, between no compression, gzip or lzo.

# vzdump --compress gzip 655


The command will generate 2 files, a data file and a log file. Transfer the data file to the other proxmox installation, using whatever methods. I just use scp.

# scp vzdump-qemu-655-2020_10_10-13_51_13.vma mynewproxmox.ip.add.ress:


Once transferred, restore the file into a VM, by providing the VMID. This command will restore the dump file into a VM with VMID 300.

# qmrestore ~/vzdump-qemu-655-2020_10_10-13_51_13.vma 300


Oh, and all this can be done via GUI, but for this tutorial, I will just cover the command line part :).


Enjoy.

Thursday, October 8, 2020

Troubleshooting proxmox pve-cluster down

Out of the blue, one of my proxmox node becomes offline in the web ui. All the VMs in that node is still working though, and the node is reachable via ssh, so network is not an issue. After searching around, it is because pve-cluster is down on that node, causing it to be invisible to the cluster altogether.

Looking around for clue, I found out that /etc/pve is empty, and "ls /etc/pve" returned "transport endpoint is not connected". journalctl command returned something more subtle, as below:

"host1 pmxcfs[29698]: [main] crit: fuse_mount error: Transport endpoint is not connected”

After searching around some more, I found out that the mountpoint is gone, and I need to remount /etc/pve back to get pve-cluster running.

Normal and forced unmount does not work. Thanks to this post, lazy unmount worked. So in order to restart pve-cluster, I have to lazy unmount /etc/pve first, the restart the pve-cluster.

# umount -l /etc/pve

# systemctl restart pve-cluster

# systemctl status pve-cluster

...

Active: active 

...


And my node is now back online in the proxmox webui.


Monday, August 24, 2020

Using yum through socks5 proxy

This is useful when you have a server that is not allowed to go to the internet, but have an ssh connection to another server that is able to go to the internet (we can call it jumphost).


1. Setup a socks proxy on port 8888 (any port will do, 8888 is just my preference) via the jumphost

# ssh -D 8888 -fN user@jumphost


2. Append below line into yum.conf

# cat  >> /etc/yum.conf <<EOF

proxy=socks5h://localhost:8888

EOF


3. Yum away (or run the yum command). All yum command will now tunneled through jumphost

# yum update


4. Once done, kill the socks proxy connection

# kill -9 $(ps -ef | grep fN | grep -v grep | awk '{print $2}')


5. And remove the proxy setting in /etc/yum.conf

# sed -i '$d' /etc/yum.conf

Sunday, August 23, 2020

Using mkchromecast in Linux Mint 20

 I used to use mkchromecast in my linux mint 19 without any issue, The installation is pretty straight forward, easy to use, and the best of all, is that mkchromecast is able to cast video with subtitle. 


After I have upgraded my machine to Mint 20, I installed it, and encountered one issue whereby mkchromecast does not pair properly with chromecast due to an issue in the pychromecast version used in ubuntu 20.04 (or linux mint 20 in my case). 


The bug is being reported in here, and was from this page that I found by googling the error.


So to install mkchromecast in linux mint 20 (or ubuntu 20.04), here are the steps:

1. Install the application

$ sudo apt install mkchromecast -y


2. Update pychromecast package to version 4.1.1

$ pip3 install pychromecast==4.1.1


That's all. To use it, just follow below steps:

1. Open a new terminal, and cast a video

$ mkchromecast --video -i myvideo.mp4


2. If you want to cast a video with a subtitle file

$ mkchromecast --video -i myvideo.mp4 --subtitle mysubtitle.srt


3. If you have multiple chromecast device, please use -s, and choose the index of the chromecast device you would like to use

$ mkchromecast --video -i myvideo.mp4 --subtitle mysubtitle.srt -s


4. Casting with basic control like pause (keyboard p), resume (keyboard r), volume up (keyboard u) and volume down (keyboard d)

$ mkchromecast --video -i myvideo.mp4 --subtitle mysubtitle.srt --control


mkchromecast is an excellent tool to cast your video to the big screen, but if you are not comfortable with casting with commands, vlc and google chrome browser are better tools but without the subtitle.


Monday, August 17, 2020

Monitoring coreutils basic operation progress, with progress app

While copying or moving stuff across locations in my computer, using terminal, most of the time I want to have a progress reporting of how much has been copied or moved. This can be easily achieved using a neat little tool called progress. To use it, you have to install it first.

To install progress

$ sudo apt install progress -y


Start you coreutils basic operation (cp, mv, dd, tar, gzip/gunzip, cat, etc.)

$ cp CentOS-8.1.1911-x86_64-dvd1.iso /data/


Monitor the progress using progress. Just run progress:

$ progress


To continuously see the progress, just use the -m option. It will update regularly, and speed and estimated remaining time will be shown 

$ progress -m


Friday, August 14, 2020

Quick DNS Server on Centos 8 using dnsmasq

To setup a quick and easy DNS server for CentOS 8, I choose dnsmasq. Bind is powerful, but too complicated for a simple DNS in a small LAN environment. So let's get started.


Install dnsmasq

# yum install dnsmasq -y


Backup original dnsmasq.conf configuration file

# cp /etc/dnsmasq.conf /etc/dnsmasq.conf.ori


Insert some settings into dnsmasq.conf. This is assuming our CentOS box IP address is 192.168.0.120, and it's interface is enp0s3. The "server" settings are for upstream DNS addresses.

# cat > /etc/dnsmasq.conf <<EOF

listen-address=::1,127.0.0.1,192.168.0.120

interface=enp0s3

expand-hosts

domain=local.lan

server=192.168.0.1

server=8.8.8.8

server=8.8.4.4

address=/local.lan/127.0.0.1

address=/local.lan/192.168.0.120

EOF


Test your configuration for any syntax error
# dnsmasq --test

Now to put in some dns records. Dnsmasq will read all records from /etc/hosts of the dnsmasq server (how easy & convenient is that?!)
# cat >> /etc/hosts <<EOF
dns 192.168.0.120
web 192.168.0.120
EOF

Start your dnsmasq service
# systemctl start dnsmasq

Allow DNS in firewall
# firewall-cmd --add-service dns
# firewall-cmd --add-service dns --permanent

Now to put your DNS to test. The best is to use other machine. My other machine is using DHCP, so I need to configure the DNS setting to point to my brand new dnsmasq server, and ignore the dns given by my DHCP
# nmcli connection modify enp0s3 ipv4.ignore-auto-dns yes
# nmcli connection modify enp0s3 ipv4.dns 192.168.0.120
# nmcli connection down enp0s3
# nmcli connection up enp0s3

Ping test
# ping web
PING web (192.168.0.120) 56(84) bytes of data.
64 bytes from web.local.lan (192.168.0.120): icmp_seq=1 ttl=64 time=0.134 ms
64 bytes from web.local.lan (192.168.0.120): icmp_seq=2 ttl=64 time=0.129 ms

You have got yourself a brand new DNS server, congratulations!


Monday, August 10, 2020

Monitor the progress of copy operation with pv

 Sometimes, when we need to copy a big file, let's say from our linux box, to a flash drive, and we just used the "cp" command. After a while, we are anxious to know what is the progress, and unfortunately we have forgotten to turn on verbose for the command. 


What to do? Cancellation is not an option, since we would be wasting time restarting the command again if we want to put the verbose option.


Worry not, there is a solution. And this solution is pv. Most of the time it is not installed by default, so we have to install it first.


What is pv? According to its man page, pv will monitor the progress of data through a pipe. Nice!


How do we install it?

$ sudo apt install pv -y


How do we use it? We can track the progress of any command, just by providing the PID of that running command. Let's say we are copying an iso. 

Firstly, get the PID of the cp command., and then run pv against it. 

$ ps -ef | grep iso | grep -v grep | awk '{print $2}'

12345

$ pv -d 12345

and pv will provide you with a nice progress bar, with E.T.A. like below

Friday, August 7, 2020

SSH tunnelling to bind on all interfaces

Most of the time, we would not need this, since tunneling to a localhost is all we need to achieve our objective. Until one day, I have the requirement to actually tunnel my "behind the firewall" port to a public IP of a remote server. And here is how I do it.

Actually you can specify which IP you want the tunnel to be set up to. Let's say we want to set up a local tunnel on port 2222 of the address 10.20.30.40, connected to localhost port 22 at the remote server.

$ ssh -L 10.20.30.40:2222:localhost:22 user@remote.server.ip.address


If we want the tunnel to listen to all IPV4, we can do like below

$ ssh -L 0.0.0.0:2222:localhost:22 user@remote.server.ip.address


If we want just IPV6, we can do as below

$ ssh -L "[::]:2222:localhost:22" user@remote.server.ip.address


If we want the tunnel to listen on all interfaces, we can do like below

$ ssh -L \*:2222:localhost:22 user@remote.server.ip.address


That's all, happy tunnelling :)

Thursday, August 6, 2020

How to install shutter in Linux Mint 20

Shutter is a great screenshot application on linux for me. It can take screenshot, it can edit picture, it is like a complete package. Sadly. the development of this great software has been stalled. Shutter is not available through official repository, so we have to use an unofficial ppa to install it. Do not worry, the steps are very simple.

First and foremost, open your trusty terminal.

Install the unofficial ppa
$ sudo add-apt-repository -y ppa:linuxuprising/shutter

Update the apt database
$ sudo apt update

Install shutter
$ sudo apt install shutter -y

That's it, just in 3 simple steps, you are good to go in using shutter. Happy shuttering.

Tuesday, July 7, 2020

Check which linux kernel module is loaded

To check what modules are currently being loaded in kernel, you can just use lsmod command

$ lsmod 

The output will look like below


To get more information about a particular module, you can use modinfo. Lets say we want to get more information about psmouse module
$ modinfo psmouse

The output will look like below


Saturday, June 27, 2020

Testing mysql database connection using php mysqli

Sometimes you do not have mysql client in your web server to test mysql connection to database server. Using this method, you can use php, which will be available in all php based web server, to test your connection. This method is very easy to implement, just one line to do the testing. Thank you to Mr Guus for this awesome method

We are going to use var_dump with mysqli_connect functions, available in php.

$ php -r 'var_dump(mysqli_connect("10.0.0.10", "myuser", "mypassword", "mydatabase"));'

whereby 10.0.0.10 is my database ip address, myuser is my database username, mypassword is my database password, and mydatabase is the name of my database. Php -r is an option to run php command without the script tags

If the command does not throw any error, then your database connection is good to go.

Friday, May 8, 2020

Update DNS Server Information on Linux CentOS 7

To update the DNS server that the operating system will refer to, please follow below easy steps

1. Edit /etc/resolv.conf. In this example I use nano text editor. If you do not have nano, you can install it by running "yum install nano -y"
# nano /etc/resolv.conf

2. Type in "nameserver" followed by a space, and followed by your DNS server ip address. Please remember that the sequence of the entry is important. So please put your primary DNS server on top of your secondary server in the /etc/resolv.conf. In this example, my primary DNS is 192.168.1.1 and my secondary DNS is 192.168.1.2
nameserver 192.168.1.1
nameserver 192.168.1.2

3. Save and exit. For nano, you can simply press Ctrl-x, y and Enter.

4. Check if you have added the configuration correctly
# cat /etc/resolv.conf
nameserver 192.168.1.1
nameserver 192.168.1.2 

Thursday, May 7, 2020

Update Proxmox Network Configuration Without Restarting

In proxmox 6.1-7, if you make any changes to network configuration using the web interface, you either have to reboot the box, or press the "Apply Configuration" button to apply the changes. But the "Apply Configuration" button needs a package named ifupdown2 from proxmox repository to operate correctly.

So in order to make the button usable, so that we do not have to reboot the box every time we change proxmox network configuration, please follow below simple steps

1. Enable pve no-subscription repository, and disable proxmox default enterprise repository by referring here

2. Update proxmox package information
# apt update

3. Install ifupdown2
# apt install ifupdown2 -y

4. Now you can change any network settings in the proxmox web ui, and apply the configuration by pressing "Apply Configuration" button like below


Wednesday, May 6, 2020

Using Openvpn Client in Alpine Linux

Installing openvpn client in alpine linux is very easy. Just follow below command

# apk add openvpn

To use it, just run the command against an openvpn configuration file
# openvpn myopenvpnconfig.file

The first time you are using openvpn client, you will probably get this error:
ERROR: Cannot open TUN/TAP dev /dev/net/tun: No such file or directory (errno=2)

What you can do is just give 666 permission to /dev/net/tun
# chmod 666 /dev/net/tun

and rerun the openvpn command
# openvpn myopenvpnconfig.file

Once you get this message "Initialization Sequence Completed", you should be able to access your remote server


Thursday, April 30, 2020

Run a Joomla CMS in Podman Pod

One of the special feature of podman over docker is, podman has the concept of pod. Pod is a feature to group containers together. One example is, is lets say we want to deploy a joomla stack. The stack can be deployed in a pod, so that the containers can be managed together, without having to operate on each single component of the stack.

To create a pod with port 8080 on localhost will be redirected to port 80 in a pod
$ podman pod create --name mypod --publish 8080:80

Next, create a container for database that belongs to our pod above
$ podman run -dit --pod mypod -e MYSQL_DATABASE=joomla -e MYSQL_USER=joomlauser -e MYSQL_PASSWORD=joomlapassword -e MYSQL_ROOT_PASSWORD=rootpw --name mariadb docker.io/library/mariadb 

Check whether your mariadb container is ready, by viewing its logs
$ podman logs -f mariadb

After that create a joomla container. Since both the containers are in the same pod, joomla container can refer to mariadb with just 127.0.0.1 since both of them share the same network namespace in a pod
$ podman run -dit --pod mypod -e JOOMLA_DB_HOST=127.0.0.1 -e JOOMLA_DB_USER=joomlauser -e JOOMLA_DB_PASSWORD=joomlapassword -e JOOMLA_DB_NAME=joomla --name joomla docker.io/library/joomla

Similar to mariadb container, you can check whether your joomla container is ready by viewing its logs
$ podman logs -f joomla

Start a browser, and browse to http://0.0.0.0:8080. You should be able to access the joomla web interface. Continue with the installation using the web interface. Make sure you put 127.0.0.1 for the database host information in the web installer.


Saturday, April 25, 2020

Starting a Web Server using Podman

To start a web server using podman, in this case we are using nginx from docker repository, just run below command to start a webserver and expose it on port 8080 localhost
$ podman run -dit -p 8080:80 docker.io/library/nginx

Test our brand new web server
$ curl -s localhost:8080 | tail
working. Further configuration is required.</p>

<p>For online documentation and support please refer to
<a href="http://nginx.org/">nginx.org</a>.<br/>
Commercial support is available at
<a href="http://nginx.com/">nginx.com</a>.</p>

<p><em>Thank you for using nginx.</em></p>
</body>
</html>


Friday, April 24, 2020

How to Install Podman on CentOS 8

Podman is a daemonless container engine for developing, managing, and running OCI Containers on your Linux System. 

Some of the advantages of podman over docker for managing your linux containers are:
1. Podman is daemonless
2. Podman is fully compatible with docker, thus can run docker images without any modification even from docker.io
3. Most podman commands can be run as a regular user, without requiring additional privileges. 
4. Used by Redhat in latest openshift container platform

To install podman on CentOS 8, just run below command

# dnf install podman -y
or 

# yum install -y podman

Once installed, check podman version to ensure podman has been installed successfully
# podman --version


Thursday, April 23, 2020

Downloading ISO Directly to Proxmox Using Command Line

This is usually the faster way to get any iso to proxmox, especially if you are connecting to proxmox via some not so fast internet connection. But if you still prefer to use the web GUI, please refer to this post on how to do it via the web UI.

Go to the directory where iso's are being kept in proxmox
# cd /var/lib/vz/template/iso

If you have not downloaded the ISO, you can download it directly in this directory. For example I want to download a Centos 8 ISO
# wget http://centos.ipserverone.com/centos/8-stream/isos/x86_64/CentOS-Stream-8-x86_64-20191219-dvd1.iso

Once done, refresh the webUI


Proxmox VE No Subscription Repository

When you install Proxmox VE, by default the system will be configured to use Proxmox VE enterprise repository, which needs subscription in order to use it.


If you do not plan on purchasing the subscription, but still want to get updates on the latest package, you can use Proxmox VE no-subscription repository.

According to this document, this repository is recommended only for non production, as the packages are not heavily tested. Proceed at your own risk if you want to use it for production.

To enable the pve no-subscription repository
$ echo "deb http://download.proxmox.com/debian/pve buster pve-no-subscription" | sudo tee -a /etc/apt/sources.list

To disable the enterprise repository
$ cd /etc/apt/sources.list.d/
$ sudo mv pve-enterprise.list pve-enterprise.list.disabled

Update package information
$ sudo apt update

You should now be seeing the new no-subscription repository being checked, and the enterprise repository being left out

Wednesday, April 22, 2020

Windows in Proxmox Cannot Detect Virtio Network Adapter

I encountered this issue when installing Windows 2019 on proxmox Virtual Environment 6.1-7.

Below is my windows VM setting


In windows, I cannot see any network adapter to be configured.

After looking around in proxmox documentation, I found this gem, whereby you can download driver for the windows so that your windows can recognize the virtio interface.

You can download the iso for the driver from the above link, or using this direct link.

Once downloaded, upload the iso to proxmox using these steps.

Insert it into our windows vm cd drive, like below


You should now be able to see the iso mounted as D drive (depending on how many partition you have in your windows VM)


Now you have to install the driver. Press windows + s, type Device Manager and press Enter.

Expand "Network Adapters", you should see one adapter that is not recognized by windows.

Right click on it, and choose "Update driver"

Click on "Browse my computer for driver software"

Type in D:\ for the location, and tick "Include subfolders"

Click Next, and the wizard will search for a suitable driver for your device. Wait for it to finish.

Once done, it will show that your windows now has recognized the network adapter.

Reboot, if the wizard asks for it.

Done
     

Monday, April 20, 2020

Adding Internet Based Repositories in Alpine Linux

What I like about alpine linux is, it is very fast to get to a working linux with a shell inside a VM, and I can start testing whatever I need to test straight away. But the default setting of alpine linux does not preconfigured to get any packages from the internet, which is a pity. So we have to add it manually.

To add the main and community repositories manually, run below commands
# echo 'http://dl-cdn.alpinelinux.org/alpine/edge/community' >> /etc/apk/repos
# echo 'http://dl-cdn.alpinelinux.org/alpine/edge/main' >> /etc/apk/repos

Update repository indexes
# apk update

That's it. You can now search for any package
# apk search openssh

And install any package
# apk add openssh-client

Thursday, April 9, 2020

Enable pfsense Web Interface from WAN Temporarily

By default pfsense only allow access to web interface from LAN. But sometimes you need access from WAN, just for a very short time. For example, you do not have any machine in LAN that have web interface, and you need the web interface to make some changes.

The steps are as follows, if you have access to pfsense text based console

1. Access the text based console


2. Choose option 8, to access the pfsense shell

3. Run this command: pfctl -d

4. Once you get the message "pf is disabled", you can now access pfsense web interface using WAN ip, in this case, 192.168.20.3, and make your changes in the web interface. Once you activate the changes, the firewall will be turned on again, so you won't be able to access web interface via WAN anymore.

5. If by any chance you want to enable back firewall manually, run: pfctl -e


If you do not have access to the console, you have to use ssh.

1. ssh into any linux machine on the LAN side

2. From the linux machine, ssh into pfsense

3. Run pfctl -d

4. Access your pfsense web interface via WAN IP. The firewall will automatically started if you "Apply Change" in web interface.

5. If you want to enable pf manuallt, run pfctl -e.

6 Logout from pfsense

Credit to this site for the great tutorial.

Wednesday, April 8, 2020

Uploading iso to Proxmox

To upload iso to proxmox, so that the iso can be used to create VM, please follow below steps


1. Login to proxmox
2. On the left hand side, expand Datacenter, until you see node/s
3. Expand the node until you see local. Click on "local"
4. On the right hand side, click "Content"
5. Click "Upload"
6. Select the iso file that you want to upload, and click "Upload"
7. Once uploaded, you will see the iso listed on the right hand side. Please refer below picture for clearer view


Friday, April 3, 2020

Install and Use Vagrant on Linux Mint 19 with Virtualbox

Vagrant is a tool for building and managing virtual machine environments in a single workflow. With an easy-to-use workflow and focus on automation, Vagrant lowers development environment setup time, increases production parity, and makes the "works on my machine" excuse a relic of the past.


We can always install vagrant from the repository, but the one in the repository is quite an old version, which is 2.0.2. So we will download the latest version from https://www.vagrantup.com/downloads.html. Since they do not provide a package for ubuntu/mint, we will use debian package.

To download the installer
$ wget -c https://releases.hashicorp.com/vagrant/2.2.7/vagrant_2.2.7_x86_64.deb 

To install vagrant
$ sudo apt install ./vagrant_2.2.7_x86_64.deb -y

Download virtualbox, if you still have not install it
$ wget -c https://download.virtualbox.org/virtualbox/6.1.4/virtualbox-6.1_6.1.4-136177~Ubuntu~bionic_amd64.deb

Install  virtualbox
$ sudo apt install ./virtualbox-6.1_6.1.4-136177~Ubuntu~bionic_amd64.deb -y

Let's say we want to create an ubuntu bionic virtual machine (VM) using vagrant. First we have to run init
$ mkdir -p  vagrant/ubuntu-bionic
$ cd vagrant/ubuntu-bionic
$ vagrant init hashicorp/bionic64
$ vagrant up

The init command will create a standard Vagrantfile, which can be used to define the specs of virtual machine we want to make.

The up command will use the Vagrantfile, and create a VM out of it.

Once all the downloading is done, the VM will be created, and you can login into the box using ssh command
$ vagrant ssh

And within just a few commands, you already have a working virtual machine without having to do the standard operating system installation just like when you create a virtual machine using the traditional way.

Thursday, February 13, 2020

Installing Wordpress on Ubuntu 18.04 Using LEMP Stack

Installing wordpress on LEMP stack is not much different from installing in LAMP stack. For those who do not know, LEMP stands for Linux + Nginx + Mariadb + PHP stack, and LAMP stands for Linux + Apache + Mariadb/mysql + PHP stack. Check out my other post on how to install wordpress on LAMP stack on ubuntu.

As per the stack definition, there are 3 main components to be installed: nginx, mariadb and php.

Install nginx:
$ sudo apt install nginx -y

Install mariadb:
$ sudo apt install mariadb-server -y

Install php, php-mysql and php-fpm
$ sudo apt install php php-mysql php-fpm -y

Download wordpress code
$ wget https://wordpress.org/latest.tar.gz

Start mariadb
$ sudo systemctl start mariadb

Secure mariadb installation
$ sudo mysql_secure_installation

Create a database for wordpress
$ sudo mariadb -u root
MariaDB [none]> create database wpdb;
MariaDB [none]> grant all on wpdb.* to wpuser@localhost identified by 'wppassword';
MariaDB [none]> flush privileges;
MariaDB [none]> exit

Test the newly created user and db
$ mariadb -u wpuser -p wpdb
MariaDB [wpdb]> exit

Download wordpress
$ wget https://wordpress.org/latest.tar.gz

Extract wordpress
$ tar -xvf latest.tar.gz

Move wordpress directory to /var/www/html
$ sudo mv wordpress /var/www/html

Change ownership of the wordpress directory
$ sudo chown -R www-data /var/www/html/wordpress

Create nginx virtualhost configuration for wordpress
$ sudo nano /etc/nginx/conf.d/wordpress.conf

Add in below code (change the server name to refer to your ip address, since we do not have any domain at the moment)
server {
        listen   80;

        root /var/www/html/wordpress;
        index index.php index.html;
        server_name wordpress.10.0.0.5.nip.io;

        location / {
                try_files $uri $uri/ /index.php?q=$request_uri;
        }

        error_page 404 /404.html;
        error_page 500 502 503 504 /50x.html;
        location = /50x.html {
              root /usr/share/nginx/www;
        }

        location ~ .php$ {
                try_files $uri =404;
                fastcgi_pass unix:/run/php/php7.2-fpm.sock;
                fastcgi_index index.php;
                fastcgi_param SCRIPT_FILENAME $document_root$fastcgi_script_name;
                include fastcgi_params;
        }
}


Save the file and exit

Test nginx config for any syntax error
$ sudo nginx -t

Start nginx
$ sudo systemctl start nginx

Start php-fpm
$ sudo systemctl start php7.2-fpm

Open a web browser and put in you server_name address in the address bar, and you should be able to get the wordpress installation wizard. Press "Continue"


Press "Let's go!"

Fill up database details and press "Submit"

If everything is correct, you will get to "Run the installation" page. Click on "Run the installation" button. 

Fill up the necessary information for your wordpress blog, and click "Install wordpress" to finish wordpress installation