Thursday, December 24, 2020

Using Volume in Docker to Store Persistent Data

Docker container is not persistent, that means, the data stored in a docker container will be gone if the container is destroyed. One of the way to store persistent data while using docker container, is to use the docker volume feature to store your data. 


To use the volume, we need to create the volume first. 

$ docker volume create myvolume


We can inspect the volume's detailed information using inspect command. This is how we get to know where exactly in filesystem, that the volume resides. and all other information about the volume.

$ docker volume inspect myvolume

[

    {

        "CreatedAt": "2020-12-24T09:18:03+08:00",

        "Driver": "local",

        "Labels": {},

        "Mountpoint": "/var/lib/docker/volumes/myvolume/_data",

        "Name": "myvolume",

        "Options": {},

        "Scope": "local"

    }

]


To make use of the volume, we will use the --volume flag of the docker run command. For example, we want to create a container from an alpine linux image, run a command in it (in this example, a date command), store the output of the command in a volume, exit, and delete the container after that.

$ docker run --rm --volume=myvolume:/tmp alpine sh -c "date > /tmp/currenttime"


Once the container finished running, we can go to the location of the volume in the filesystem, and we can retrieve the file that is created by the container, even though that container no longer exist.

$ sudo ls /var/lib/docker/volumes/myvolume/_data

currenttime

$ sudo cat  /var/lib/docker/volumes/myvolume/_data/currenttime

Thu Dec 24 01:25:34 UTC 2020


So this is how my friend, one of the way to store persistent data generated using docker container.

Wednesday, December 23, 2020

Installing Wordpress using Podman

Podman is a daemonless container engine to manage OCI containers. To run a set of containers for wordpress installation, below are the steps. To install podman in centos 8, you can refer here.

First you need to create a pod, so that the containers can talk to each other easily within the pod. Expose port 8080 for the pod to reach port 80 in the pod

# podman pod create --name mywordpress --publish 8080:80


Wordpress consists of 2 components, a wordpress front end and a database backend. We will create the backend first, using mysql image from dockerhub. Make sure to include the newly created container into our pod.

# podman run --detach --pod mywordpress \

-e MYSQL_ROOT_PASSWORD=1234 \

-e MYSQL_DATABASE=mywpdb \

-e MYSQL_USER=mywpuser \

-e MYSQL_PASSWORD=1234 \

--name mywpdb docker.io/mysql


We will then proceed to create a wordpress container. We will use 127.0.0.1 (localhost) as reference to our mysql container, because both containers are in the same pod.

# podman -run --detach --pod mywordpress \

-e WORDPRESS_DB_HOST=127.0.0.1 \

-e WORDPRESS_DB_NAME=mywpdb

-e WORDPRESS_DB_USER=mywpuser \

-e WORDPRESS_DB_PASWORD=1234 \

--name mywp docker.io/wordpress


Open a web browser, and browse to localhost:8080 (or <ip address>:8080), to get the wordpress installer wizard. Follow through the wizard to continue the wordpress installation.

Tuesday, December 22, 2020

Set Bitnami Wordpress Application to Start on Boot on Ubuntu 20.04

To set a bitnami wordpress application to start on boot, you just need to make sure that systemctl can use the ctlscript. To do that:


1. Locate the installation directory of your bitnami wordpress. If you are following the default setting, the location should be in /opt


2. Locate the ctlscript.sh file, which is the script to start, stop and restart bitnami-application.

$ sudo find / -iname "ctlscript.sh" -type f

/opt/bitnami-wordpress-5.6-0/ctlscript.sh


3. Copy the script to /etc/init.d, and rename it to bitnami-wordpress

$ sudo cp /opt/bitnami-wordpress-5.6-0/ctlscript.sh /etc/init.t/bitnami-wordpress


4. Edit the script, and add "INIT INFO" settings below #!/bin/sh to ensure systemd can understand the script

#!/bin/sh

### BEGIN INIT INFO

# Provides:          bitnami-wordpress

# Required-Start:    $remote_fs $syslog

# Required-Stop:     $remote_fs $syslog

# Default-Start:     2 3 4 5

# Default-Stop:      0 1 6

# Short-Description: Start daemon at boot time

# Description:       Enable services provided by daemon.

### END INIT INFO

...


5. Save the file, and make systemd aware of the new startup script
$ sudo systemctl daemon-reload

6. Test the new bitnami-wordpress script
$ sudo systemctl status bitnami-wordpress

7. Enable bitnami-wordpress on boot
$ sudo systemctl enable bitnami-wordpress

8. Test it out by rebooting your machine...
$ sudo reboot

9. ...and check the status of the bitnami-wordpress service after reboot
$ sudo systemctl status bitnami-wordpress

Installing a Bitnami Wordpress Stack on Ubuntu 20.04

Bitnami team have done a great job in making the adoption of a lot of open source software easier. Today I want to show how you can install a bitnami wordpress stack on ubuntu 20.04.

First, we need to visit https://bitnami.com/stack/wordpress/installer, and download the installer for linux. As of today, the version available is 5.6.0.

$ wget -c https://bitnami.com/redirect/to/1252289/bitnami-wordpress-5.6-0-linux-x64-installer.run 

Once downloaded, give the file permission to be executed

$ chmod +x bitnami-wordpress-5.6-0-linux-x64-installer.run

Run the installer

$ sudo sh bitnami-wordpress-5.6-0-linux-x64-installer.run

Run through the wizard. In this example, we will install just wordpress and mysql, with default option for most of the questions asked in the wizard.

Once the installation is complete, you will see below confirmation:

Bitnami confirmation

Choose Y to start bitnami wordpress.

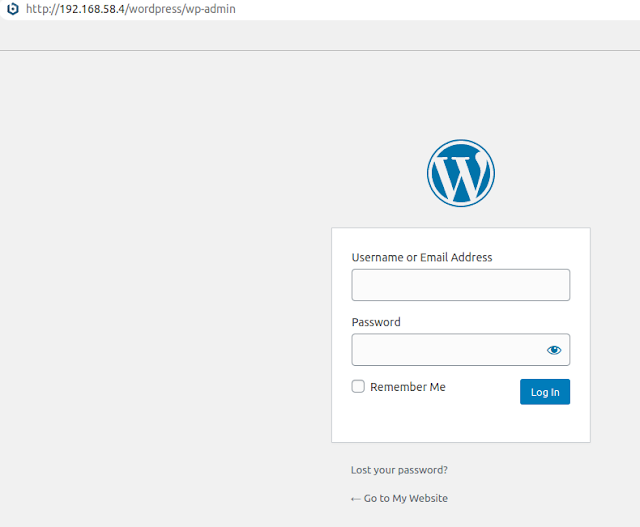
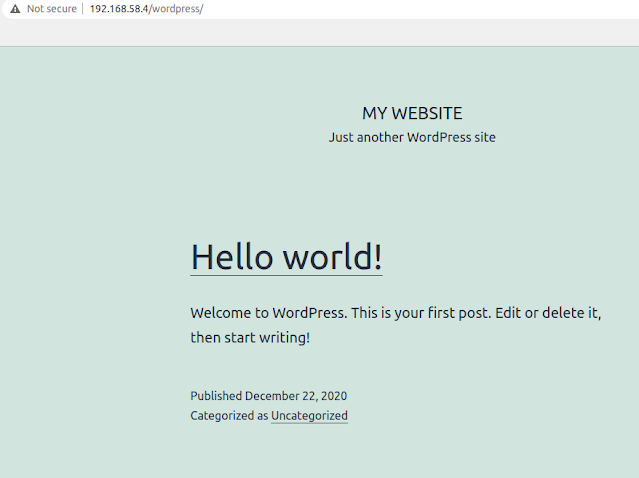
Your wordpress site can now be accessed at http://<ip address>/wordpress, and the admin page can be accessed at http://<ip address>/wordpress/wp-admin, my ip address in this example is 192.168.58.4.
Wordpress main page

Wordpress admin page

In order to control the service, you can do so by using the script in bitnami installation directory called ctlscript.sh. In this example, I used the default settings for the installation directory, which is /opt/wordpress-5.6-0.

To show status of bitnami wordpress
$ sudo /opt/wordpress-5.6-0/ctlscript.sh status

To stop wordpress services
$ sudo /opt/wordpress-5.6-0/ctlscript.sh stop

And to start wordpress services 
$ sudo /opt/wordpress-5.6-0/ctlscript.sh start


Monday, December 21, 2020

Restarting Cinnamon Desktop Environment

There are 3 ways to restart cinnamon desktop environment:

1. Use ctrl + alt + esc shortcut

2. Press alt + f2, and type r into the dialog box

3. Open a terminal (or virtual terminal pressing ctrl + alt + f1), and run this command:

$ pkill -HUP -f "cinnamon --replace"

Sleep / suspend linux from command line

To suspend a linux machine using command (useful if you want to suspend a machine that is connected via ssh), the command is pretty simple

$ sudo systemctl suspend

That's all. 

Friday, December 4, 2020

Installing Broadcom BCM4322 Driver for Linux Mint 20 (Ulyana) in Macbook Pro 2009

I got an old MacBook Pro 2009 from a friend, and the hardisk is busted. After getting a brand new Apacer Panther SSD, I managed to replace the disk, and I tried to revive the old machine using MacOS internet recovery process.

Unfortunately, this model does not have the internet recovery feature. To make a usb recovery for macos, it is highly advisable to do it from a mac, and I do not have any spare mac.

So I decided to boot a linux mint 20 live usb, and it is surprisingly working well, except the wireless driver is not installed by default.

In order to install the driver, I need to know the model first. This can simply be achieved using "lspci" command

$ lspci | grep i wireless

03:00.0 Network controller: Broadcom Inc. and subsidiaries BCM4322 802.11a/b/g/n Wireless LAN Controller (rev 01)
 

Now that we know the wireless card model and maker, I connect a network cable to the machine, and start researching for the solution. I found the solution here.

And below is how to do it.

You need to install a package called bcmwl-kernel-source from the repository.

$ sudo apt update

$ sudo apt install bcmwl-kernel-source -y


Once installed, you can now connect to your wireless, and that is all, folks.

Tuesday, December 1, 2020

Extending / in Default CentOS Partitioning Scheme

The default partitioning scheme for CentOS is not ideal, because the installer only give 50Gb to /. and the rest to /home. Luckily, the partitions are being setup in LVM, thus enable us to change it without reinstalling the operating system. 

In this example, I will show how to remove logical volume used by /home, and assign it to / instead.

First of all, you need to be root in order to do this.


This is the original partition layout:

# df -Th

Filesystem          Type      Size  Used Avail Use% Mounted on

...

/dev/mapper/cl-root xfs        50G  4.1G   46G   9% /

/dev/mapper/cl-home xfs       1.9T   14G  1.9T   1% /home

/dev/vda1           ext4      976M  194M  716M  22% /boot

...


As you can see, we are not going to use 1.9T in /home, so we are going to assign that to / instead.

Second step, make a backup of /home
# cp -apv /home /home2

Next, unmount /home
# umount -fl /home

Remove the logical volume
# lvremove /dev/cl/home

If you get an error saying that the logical volume is in used, you need to kill off the process first.

Get the major, minor number of the logical volume.
# dmsetup -c info cl-home
Name             Maj Min Stat Open Targ Event  UUID                                                                
cl-home          253   2 L--w    1    1      0 LVM-urbQSwHWhdpFDeVDQA3yFkOjVMkWFGloYGbgzAGW8YOuwacqVZLvVx23qNVJTFHc

Search for the process and process id using the major,minor number
# lsof | grep "253,2"
java       179094                           user  cwd       DIR              253,2        95 1073741952 /home
...

kill off the process
# kill 179094

Try to remove the logical volume again
# lvremove /dev/cl/home

Once deleted, extend the logical volume of /dev/cl/root, to use 100% of free space available in the volume group
# lvextend -l +100%FREE cl-root

Check the filesystem type
# df -Th /
Filesystem          Type      Size  Used Avail Use% Mounted on
/dev/mapper/cl-root xfs        50G  4.6G   46G  10% /

Extend the filesystem, xfs_growfs is xfs filesystem grow tool. For ext4, you need to use resize2fs command
# xfs_growfs /

Check that your / partition is showing the new size
# df -Th /
Filesystem          Type  Size  Used Avail Use% Mounted on
/dev/mapper/cl-root xfs   2.0T   19G  2.0T   1% /

Copy back the content of /home2 to /home
# mv /home2/* /home

IMPORTANT: Remove the old /home mount entry in /etc/fstab
# sed -i.ori '/home/d' /etc/fstab

The last step is very important, it can cause your operating system to fail to boot if /etc/fstab is not configured properly.

Enjoy your newly gained disk space in / partition.